
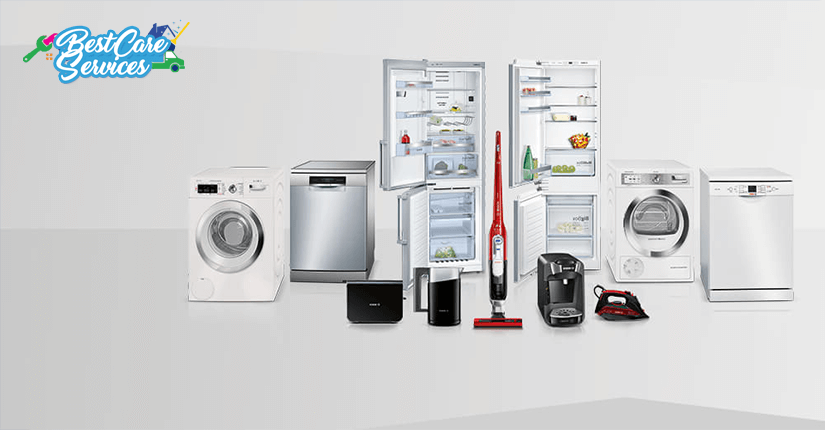
Home Appliance Repair Services in Nairobi
Home Appliance Repair Guide: Expert Solutions for Washing Machines, Fridges, Cookers, Dryers, and Dishwashers
A faulty appliance can disrupt your entire household. The good news? Many common faults have simple causes, and catching them early can save you a costly repair bill. This guide walks you through the most frequent appliance problems, what they mean, and what to do next. And when a job calls for a trained hand, our certified technicians are ready to help — quickly, safely, and at a fair price.
Safety first: Always disconnect an appliance from its power source before troubleshooting or attempting any repair. If you are ever unsure, call a qualified professional.
What We Cover
- Washing machine faults
- Refrigerator faults
- Cooker and oven faults
- Dryer faults
- Dishwasher faults
Washing Machine Repair
Common Washing Machine Faults
- The washer will not turn on
- The washer does not drain properly
- The washer does not spin or agitate
- The washer leaks water
- The washer does not dispense detergent
- The washer shakes or moves
- The washer is noisy
- The washer smells
- The washer does not finish its cycle
There is never a convenient time for a washing machine to fail. But acting quickly keeps a small fault from becoming a major one. Here is how to diagnose the most common problems — and when to bring in a professional.
1. The Washer Will Not Turn On
If your washing machine does not respond when you switch it on, the cause may be surprisingly simple. Start with the power supply and work from there.
Power. First, confirm that the machine is receiving electricity. Use a multimeter to check the outlet voltage. If there is no power, check your household electrical panel for a tripped circuit breaker. If no breaker has tripped and the outlet is not live, the outlet itself may be faulty. Switch the breaker off and contact a qualified electrician.
Motor. If the motor has overheated, the washer will shut down until it cools. An occasional shutdown is normal, but frequent overheating points to an underlying fault that a technician should diagnose.
Lid switch. Washing machines are designed to stop when the lid is open. The lid switch is a small plastic component under the lid that must engage for the machine to run. Check that it is intact and correctly positioned.
Timer knob. On some models, the timer knob must align exactly with the control panel markings. If it is slightly out of alignment, the washer will not run. Advance the timer and try restarting.
2. The Washer Does Not Drain Properly
Drainage faults range from a simple hose clog to a pump that needs replacing. You will know the moment it happens — usually from the mess on the floor.
Drain hose. A clogged drain hose is often the culprit. Remove the hose and inspect it for blockages; a garden hose can flush out stubborn debris. Also check that:
- The hose is free of kinks
- Any lint filters on the hose are clear
- The household drain system is working
- The hose sits above the water level in the drain tub
- The standpipe is at least 1¼ inches in diameter and under 96 inches tall
- The hose is not sealed into the standpipe — sealing it causes back-siphoning
Drain pump. A jammed pump will stop the machine draining. Drain the tub, disconnect the hoses, and inspect the pump inlets for foreign objects. If the pump has seized, the belt may burn or break, and continuing to run the motor can cause further damage. In most cases, fitting a new pump solves the problem.
Foreign objects. Socks, pens, and coins can wedge between the basket and the tub, or jam the pump, halting drainage completely. Accessing the cabinet may be needed to remove them.
Too much detergent. Excess detergent creates too many suds, which prevents the machine from draining efficiently.
3. The Washer Will Not Spin or Agitate
Several faults can stop the drum from spinning. Start with the easy checks first — sometimes the machine is simply paused in a soak cycle.
Overloaded or unbalanced loads. Overloading, or unevenly distributed laundry, unbalances the machine and stops it spinning properly. Redistribute the clothes evenly in the basket and try again.
Switches and settings. A faulty lid switch will stop the washer from running and will need replacing. Also confirm that the speed selector switch is set fully on one speed, not between settings.
Drain pump. A foreign object lodged in the pump often produces a humming sound when the machine is full of water.
Belts. Worn or broken belts are a common cause. If a belt has broken, check the pulley too — a seized pulley is often the root cause, and replacing the belt alone will only repeat the failure.
Motor and transmission. The drive motor spins the basket, often through a clutch, while a crank-type gear and connecting rods inside the transmission drive agitation. If the agitator splines are stripped, or the machine spins in one direction only, the motor may need replacing. Transmission and clutch faults are complex — these are best left to a professional.
4. The Washer Leaks Water
A leak does not always mean an expensive repair. Often the fix is quick and the part inexpensive.
- Drain hose: If the machine leaks only during the spin cycle, check the drain hose. Secure the connections, inspect for cracks, and clear any clogs. A cracked hose end can sometimes be trimmed and re-clamped, though a new hose is the better long-term choice.
- Fill hoses: Check that fill hoses are in good condition and secure, but not over-tightened. Always fit a new rubber washer when reconnecting a hose.
- Water-inlet valve: Rust or mineral deposits inside the valve, or a faulty valve, can cause leaks. Replacement may be necessary.
- Too much detergent: Excess suds can overflow and mimic a leak. Hot, soft water needs less detergent than cold, hard water — try reducing the dose.
- Door seal (front-loaders): Debris builds up on the door seal over time, stopping it from sealing. A careful clean usually solves it.
- Drain pump: A worn pump seal often leaks through a weep hole. Any water near the pump points to a pump rebuild or replacement.
- Bleach dispenser: Chlorine bleach is highly corrosive and can crack plastic parts. Consider oxygenating bleach as a gentler alternative.
- Tub: A holed tub usually makes replacement of the whole machine more economical. A professional epoxy repair may buy you time.
- Tub seal: The main tub seal sits where the outer tub meets the transmission. This is a difficult job — weigh the cost of the repair against a new washer, or let us advise you.
5. The Washer Does Not Dispense Detergent
Two issues usually cause this fault:
- A clogged dispenser. Clean it monthly: pour a cup of warm white vinegar into the dispenser and run a normal cycle to flush away residue.
- The wrong product. Powder products in a dispenser designed for liquid can clog the lines. Check your manual for the correct product.
6. The Washer Shakes or Moves
A wandering washer is alarming, but the fix is usually simple.
- Uneven floor. Set the machine on a piece of ¾-inch plywood, using shims if necessary, to create a level surface.
- Improperly positioned feet. Adjust the front levelling legs to the correct height and tighten the lock nuts. Self-adjusting rear legs usually settle when you tilt the machine forward and set it back down.
- Unbalanced load. Open the machine and redistribute the laundry. Do not exceed the maximum load weight — clothes need room to move.
7. The Washer Is Noisy
Unusual sounds are often an early warning of a part that needs attention.
- Gurgling: A partial obstruction in the drain line. Clear it before it becomes a full clog and a flood.
- Clicking: An object — often a coin from a pocket — lodged in the drain. Remove it promptly.
- Buzzing or humming: A foreign object jammed in the pump. Removing the object often solves it; serious damage may require a new pump.
8. The Washer Smells
A musty smell signals mould and bacteria growth. The drum offers the perfect dark, damp environment, and every washer develops a damp biofilm over time.
- Use the right amount of detergent. Excess suds leave a residue that feeds odour. This is your best defence.
- Wash hot periodically. Hot water dissolves biofilm — especially valuable if you normally wash cold. A second rinse cycle also helps if mould recurs or the machine sits idle.
- Clean the drain pump filter monthly. Trapped coins and debris slow the water flow and create ideal conditions for mildew.
9. The Washer Will Not Finish Its Cycle
If the machine keeps running past the end of the cycle, the timer is most likely defective. Remove the control panel and check the timer contacts for corrosion or scorching. A new timer fixes the problem — a straightforward repair our technicians can complete on the same visit.
Refrigerator Repair
Your refrigerator works around the clock, every day of the year. Wear and tear eventually show, in the form of cooling faults, defrost problems, wiring issues, blocked drains, or door-sealing failures. Here are the most common causes of a fridge that will not work.
Defective MCB
If the fridge will not start, check the miniature circuit breaker (MCB) first. A faulty MCB is a leading cause of refrigerator breakdown. Call a repair professional to confirm and replace it.
Insufficient Current or Voltage
Low current or voltage at the outlet can stop the fridge from running. Test the outlet with a multimeter and voltage tester to rule this out.
Faulty Motor
A defective motor may shut the fridge down immediately or prevent it from starting at all. Motors generally require replacement when they fail — a job for a trained technician.
Faulty Compressor
The compressor is the heart of the refrigeration cycle, compressing the coolant and circulating it through the evaporator and condenser coils. A failing compressor can shut the whole unit down. Keeping it clean and lubricated helps prevent start-up problems.
Dirty Condenser Coils
The coils at the back of the fridge release heat as the refrigerant condenses. When they are caked with dust, heat cannot escape, and the fridge works inefficiently — or stops working entirely. Regular coil cleaning is one of the cheapest forms of fridge maintenance.
Coolant Shortage
If the refrigerant level is too low, the fridge may not cool correctly. A professional must refill the coolant safely.
Faulty Start Capacitor
The start capacitor triggers the compressor when the thermostat calls for cooling. If it fails, the refrigeration cycle never begins and the fridge may not start at all.
Faulty Thermostat
A defective thermostat cannot send the start signal to the capacitor, so the fridge does not turn on. Call a professional to test and replace it.
These are the most common refrigerator faults, but others exist. A qualified technician can diagnose the exact cause and protect your investment.
Cooker and Oven Repair
Diagnosing Faulty Heating Elements
If your electric oven is not heating properly, a failed heating element is a prime suspect. You can check it yourself in minutes.
What is a heating element? The coils at the top and bottom of the oven cavity are the heating elements. They supply the heat that cooks your food.
Testing the upper element. Set the oven to broil and wait a few minutes. A healthy element glows bright orange. If it does not glow at all, or only patches glow, the element has failed and needs replacing. Turn the oven off afterwards.
Testing the lower element. Set the oven to 175 °C (350 °F) and wait ten minutes. The lower element should glow bright orange. If not, replace it. Turn the oven off when finished.
Replacing an element. Note your oven’s make and model, then purchase the matching element from a local appliance store or online. Replace the damaged element as soon as possible to restore full performance.
Common Cooker and Oven Faults
| Symptom | Likely Cause |
|---|---|
| The oven will not turn on | The timer is set to “auto” — switch it to manual |
| No heat, but fan and thermostat light work | The fan element or oven element has failed |
| The oven is completely dead | No electricity supply — check the power source |
| The oven overheats and burns food | A failed thermostat |
| The door will not close properly, or has fallen off | Worn hinges or hinge runners |
| The oven cuts out after a while | A faulty safety thermostat, main thermostat, or cooling fan |
| The oven is noisy | The fan motor or cooling fan motor |
| The fan keeps running after switch-off | Normal cool-down; if it never stops, a thermostat or sensor fault |
| The interior light fails | Replace the bulb |
| The grill does not work | A faulty grill element, changeover switch, or thermostat |
| Smoke from the oven | Usually spilled food — or a new element burning off; persistent smoke suggests overheating |
| The hob works but the oven does not | The timer has been activated, often during cleaning — deactivate it per your manual |
| The RCD trips when the oven is switched on | An element has gone to earth; test each element for earth leakage, or check the wiring |
If any of these symptoms appear, a qualified engineer can identify the fault quickly and fit the right part.
Dryer Repair
A dryer that stops working properly is often showing you exactly what is wrong. Here are the most common problems and their fixes.
Quick Fixes for Everyday Dryer Faults
No heat. For a gas dryer, check that the supply line valve is fully open. Electric dryers use two fuses or breakers — the drum can still turn with one blown, but there will be no heat. A blown thermal fuse (often caused by a power surge) is inexpensive to replace.
Shuts off abruptly. Usually the thermostat, thermal resistor, or thermal fuse protecting against overheating. Each can be tested with a voltage meter.
Unusual noise. Check that the dryer is level; inspect the drum for trapped coins, buttons, or paper clips; and untangle knotted laundry, which thumps as it tumbles. (A clicking gas valve on a gas dryer is normal.)
Will not start. Clean lint from the door latch so it engages, check the power supply and internal thermal fuse, and clean behind the push-start knob.
Clothes take forever to dry. Clean the lint filter after every load. Check the outside exhaust vent for blockages and confirm the vent duct is clean, unkinked, and rigid rather than flexible. Reduce load sizes, keep the room above 7 °C (45 °F), ensure at least one inch of airspace at the front and five inches at the back, and never stack dryer sheets on the lint trap.
Lint on clothes. A full lint screen cannot catch more — clean it.
Clothes not dry after an automatic cycle. Very small loads may not contact the moisture sensor strips; use timed dry instead. Clean the sensor strips with rubbing alcohol if softener residue coats them.
Common Dryer Problems in Depth
1. The dryer will not turn on.
- Check that all control buttons are fully depressed and the settings are correct.
- Test the outlet with a multimeter; check the electrical panel for tripped breakers. If the outlet is faulty, call an electrician.
- Inspect the power cord for fraying — cords wear with age and movement.
- Test the terminal block (power on — exercise extreme caution, or call a repairman).
- Clean lint from around the door gasket and switch so the door closes fully. A faulty door switch may need replacing.
- Test the cycling thermostat with a multimeter set to RX1: a healthy thermostat at room temperature reads zero; anything else means replacement.
- Test the start switch: it should read infinity at rest and zero when pressed. Any other result means a faulty switch.
- A tripped thermal fuse cannot be reset — it must be replaced.
2. The dryer is noisy. Worn drum glides, a lint-clogged blower wheel, worn drum support rollers (replace them as a set — they wear evenly), or a worn belt are the usual suspects.
3. Wrinkled clothes. Remove laundry promptly and fold or hang it immediately. Use the permanent press cycle with its cool-down phase, avoid mixing heavy and light items, and do not run multiple loads at once.
4. The drum does not tumble. The most common cause is a broken or slipped belt. When replacing the belt, also fit a new idler pulley — a worn pulley stresses the belt and shortens its life. Worn drum support rollers also stop the drum turning. To test for a seized motor: remove the belt, check the blower housing for blockages, and hand-turn the motor shaft. If it will not turn, the motor needs replacing.
5. No heat. Check the settings first, then test the thermal fuse (replace it if tripped, and clean the vents — trapped heat blows fuses), heating element, temperature switch, thermostat, timer, and power cord. For gas dryers, check whether the ignitor cycles and glows; if it cycles but the burner does not engage, the gas valve coils may be defective. A clean, blue burner flame means the burner is healthy.
6. Clothes take too long to dry. A clogged lint filter is the most common and most dangerous cause — it forces the dryer to overwork, leaves lint on clothes, and is a genuine fire risk. Clean it after every load.
7. The dryer is too hot. Treat this as urgent — overheating is dangerous, and internal parts stay hot long after switch-off. Test the thermostat and heating element, clean the lint trap, and clear the vent to the outside. An obstructed vent risks not only overheating but also carbon monoxide build-up in gas dryers.
A note before you start: Take photos or notes as you remove panels and wiring. What seems obvious during disassembly is rarely obvious during reassembly. You will need a screwdriver and a multimeter for most tests. If you order parts, always have your dryer’s manufacturer and model number to hand.
Dishwasher Repair
From leaks to cold water and noisy cycles, most dishwasher faults have a solution that spares you hand washing.
Leaks. Check that you are not using too much detergent (a soapy residue in the tray is the tell-tale sign), that dishes are stacked properly rather than crammed in, and that the door seal is in good condition — your manual lists the correct replacement part. Check the pipe connections at the back are sound and fastened. Severe corrosion at the base usually means the machine needs replacing.
Not filling. If dishes come out dry and dirty, the machine is not taking in water. Check that the hot water stop valve under the sink is fully open, then check whether the water inlet valve is clogged with debris. Persistent problems call for a professional engineer.
Not draining. A little water in the tub is normal. If more remains after each wash, check the drain hose for damage and the household drains for blockages. If both are fine, the pump assembly may need replacing.
Not washing properly. Poor loading is usually to blame. Stack dishes so that water and detergent can reach every plate, and try adding a little more detergent. If the problem persists, call an expert.
Not taking the detergent. The machine only uses what it needs. Reduce the dose for a few runs and see if it improves.
Water is cold. Hold a thermometer under the hot water tap for two minutes. The water should reach at least 60 °C (140 °F). If not, turn up the water heater dial.
Excessive noise. Loose or worn parts — or simply bad stacking — can make a machine noisy. When the machine is cold, remove any hard objects such as bones, fruit stones, or stray cutlery. Ensure the unit sits level. A thumping sound points to the water inlet valve.
When to Call a Professional
Some faults are safe and simple to fix yourself. Others — motor, transmission, compressor, and sealed-system work, or anything involving mains electricity — demand training, tools, and experience. Attempting a complex repair without them can turn an affordable fix into a written-off appliance.
Our qualified technicians diagnose faults quickly, use the correct parts for your model, and stand behind their work. Book a service visit today and keep your appliances running for years to come.